Search This Blog

Friday, March 31, 2017

WiFi GM MDI Multi Interface GDS Tech2Win review

GM MDI (General Motors Multiple Diagnostic Interface) with WiFi is an interface between your vehicle DLC and a PC (by wired USB, wired Ethernet, wireless Ethernet ) and TIS2web.
GM MDI scan tool can certainly test all of the GM car from 1990 to 2013( Supports 2010-2012 Australia Holden).
Are available for SPS programming on current and also future SGM vehicles.
Required for diagnostics on new SGM Global A Electrical Architecture Vehicles.
Used with TIS2Web, GM Global Diagnostics System (GDS), SPS and MDI Manager Software.
Allows for GDS diagnostic.

GM MDI China clone Working well. Tested with GDS2 v.12.
Device works with GDS2 (Opel).
Device works with Tech2Win. (Opel, Hammer)
Device not works with SAAB via Tech2Win.
Price: USD259 + shipping cost(based on your country)
Pay via Paypal
REAL PHOTOS


The MDI came ready to use with the software installed. It worked since I already had Tech2Win, GDS2 and GM MDI Manager installed on my laptop. It works extremely well and I have no problems with it. The product image at the time I order showed the cable keeper, A/C 12 volt adapter and multiple diagnostic interface user’s guide CD which is used to install the MDI manager software on your laptop. These items were not included. It also said it was Wifi but did not come with a wireless card but with a wireless interface instead. There are two versions of GM MDI interface on China market, cheaper MDI less than US$180 with only USB connection and the other more expensive with wifi wireless connection.
The product would work excellent if you had the MDI manager software already on your laptop.


My device tested with many cars for 4 months.
Device works with GDS2 (Opel).
Device works with Tech2Win. (Opel, Hammer)
Device not works with SAAB via Tech2Win.
Tested by my own, works with Saab 9-5, 2003, 3.0
It works with tis2000 and tech2win NAO.
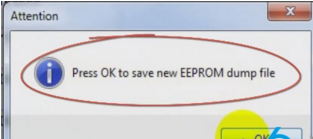
My MDI clone works fine with tech2win and also TIS2000 software.?Used it for diags and pcm flashing with no problem (through usb port only, cause wifi is unstable for programming functions).
Added a wireless card to that one too, same flawless performance.. Only issue for me is that they all have the same serial number.. So using 2 of them in the same shop with wireless would be impossible..
compared boards from a genuine to this clone, almost identical.. multiple layer pcbs, same tracers, didn’t see any difference except the board labeling was missing on the clone.
Wifi GM mdi good, interface works online. update mdi 100%. offline not that good for new cars.
Nissan Consult III Plus Ver.46.30 works on MDI interface as well (this is not tested by me, your are on your risk).


Function:
1. Diagnostic Trouble Codes (DTCs) Available Powertrain, Body, Chassis, Diagnostic Circuit Check system.
2. Ability to capture stored DTCs, Freeze Frame, Clear DTCs, Review DTCs.
3. Data Display: ECU, Vehicle Information.
4. SnapList: System Config, Data, Inputs, Outputs, Security, more….
5. Available diagnostic data parameters from the various system ECUs. A specific predefined list of diagnostic data parameters may be available
6. Bi-directional The authentic GM 1992-current year software will provide full bi-directional control when performing power train, chassis, and body diagnostics.
7. Support Vehicle Type: Car, LD Trk, MPV, Incomplete Medium Duty Truck, Saturn.
Xcar360 Automotive diagnostic tool , diagnostic software
More information
Contact
Steven
Senior Sales Engineer
Xcar360.com
Skype:uuc050
Whatsapp:8613922818729

Thursday, March 30, 2017

BMW INPA K+DCAN FT232RQ cable can read 8 pin K-line

Some BMW INPA interface users reported that the INPA K+DCAN cable build with FT232RL chip failed to diagnose K-line BMW. The new BMW INPA K+DCAN INPA Ediabas cable with FT232RQ chip and switch has newly rolled out in obd365.com to solve this issue.
The new BMW INPA Ediabas cable works on BMW with 8 pin and with K-LINE protocol.
Interface USB OBD2 for BMW – INPA/Ediabas – K+DCAN allows full diagnostic of BMW from 1998 to 2008 (all functions as in OMNITEC interface). Build in 2 lines K and D-Can magisterial.


BMW INPA K+CAN Features:
1. Read and delete errors
2. Adaptations
3. Driver programming
4. Applu coding
– And others…

BMW INPA K+CAN Supports Protocols
* Fast magisterial D-CAN and PT-CAN (500 kbit/s)
* Slow magisterial K-CAN (100 kbit/s)
* Standard BMW protocol (BMW OBD interface).

D-CAN for
* E60, E61 od 03/2007
* E83 od 09/2006
* E81, E87 od 03/2007
* E90, E91, E92, E93 od 03/2007
* E70 (new model X5)
* R56 (new model MINI)
PT-CAN, K-CAN – fully switchable speed of magisterial CAN – you can diagnose driver without any car
Protocol “BMW OBD interface” for Older Cars
* From 1995 to 1998 (don’t need K-line).
* From 1998 to 03/2008 (all models)

New INPA cable PCB picture attached:

Xcar360 Automotive diagnostic tool , diagnostic software
More information
Contact
Steven
Senior Sales Engineer
Xcar360.com
Skype:uuc050
Whatsapp:8613922818729

Wednesday, March 29, 2017

How to install MVCI Toyota Techstream on MacBook

This Xhorse MVCI Toyota Techstream setup is a MackBook Pro with 8 GB RAM running VMware. In the VM I am running Win XP Pro, SP3 to which I have allocated 2 GB. This seemed to be a happy medium to get the VM running at a reasonable speed.
Anyway on further reflection, I decided to do an overview of what I believe to be the logical steps to install MVCI/TS and try not to get too bogged down in the technical minute of the detail.


I’ll quickly list the steps, then follow that with an explanation of my logic. So here goes:
  1. Install the Xhorse MVCI driver MSI that came with your cable.
  2. Plug in your MVCI cable. (IIRC you should see some Windows install activity in the bottom right-hand side of the screen.)
  3. Run the?X-Horse Firmware Updater Tool?and confirm you see all the fields populated with data, including the Firmware version.
  4. Install the TS software that came with your cable.
  5. BEFORE opening TS (big temptation, but resist), open a Finder window and locate C: Program files\Toyota Diagnostics \Techstream\Env
  6. Within this folder locate IT3System.ini and open it in?TextEdit.
  7. Scroll down to AVAILABLE FUNCTION SETTING
  8. Switch off the TIS Function by changing TISFunction=1 (or what ever value it is) to TISFunction=0 {i.e. zero}
  9. Click File, and Save.
  10. Now open TS and BEFORE you do anything else, check that the TIS Techstream?VIM is NOT selected, but rather the other choice (e. g. XHorse – MVCI VIM) IS selected.
Following these steps should give you a working set up.
Things to bear in mind in order to be useful the MCVI cable need to be connected even when not connected to the car, while that seems obvious, sometime we miss the obvious.
To actually use TS, the other end of the MVCI cable needs to plugged into the OBDII port of you car. Also the car needs to be in at least IG-ON, but most of the time it will need to be in READY.
My sequence to connect is:
  • Boot computer and login.
  • Plug in MVCI into the USB port.
  • Plug in the other end into the OBDII port.
  • Make car READY
  • Launch TS.
  • Press?Connect to Vehicle; you may have to answer some questions.
  • Start diagnosing/checking.
RATIONAL FOR MY INSTALL SEQUENCE
Caveat: I have tried both install TS software and then MVCI drivers and also MVCI drivers and then TS software and while I was able to get the software working in both scenarios, I found that the approach I have outlined below was easier with a higher chance of success than doing it the other way. So be aware I’m not saying it won’t work if you install TS first, I just think what I have outlined is easier. Also, doing it this way you can do updates to a newer version easier as you just pick up the process from step 4 and go to the end. YMMV.
  1. Install the MVCI driver MSI that came with your cable. The MSI file is a Microsoft Setup Information file and it is essentially a container type of file (similar concept to ZIP, TAR, RAR files) that contains all the files you need to setup software or drivers. In our case the drivers for the MVCI cable. there is only 1 maybe 2 files that we really need to install, but one of the files is a script that executes a series of Win commands to achieve this. One of the commands is to copy an edited version of a TS file. If the TS file exists already it copies over the top of it to replace it. If it doesn’t exist, it just creates the TS folder and sub-folder structure to copy the TS file into place. This is important to understand because this is the method by which it avoids the necessity to go through the registration process in older versions of TS. Likewise, some packages require the running of TISKEY, they give you a key to enter in the registration screen of TS or they give you a hacked copy of the TS executable to copy over and replace the installed executable. None of this is necessary in this install sequence, because registration is achieved by the editing of the IT3System ini file in steps 4-8.
  2. Plug in your MVCI cable.?Windows will now connect the cable with the driver.
  3. Run the X-Horse Firmware Updater Tool and confirm you see all the field populated with data, including the Firmware version. If you can see the cable info, success! If do not connect, you need to pause here and figure out why you cannot connect.
  4. Install the TS software that came with your cable.?I found this pretty straightforward, just launch the installer and follow the prompts.
  5. BEFORE opening TS (big temptation, but resist), open a Finder window and locate C: Program files\Toyota Diagnostics \Techstream\Env.?Do these next 4 steps, trust me.
  6. Within this folder locate IT3System.ini and open it in TextEdit.
  7. Scroll down to AVAILABLE FUNCTION SETTING
  8. SwitchTIS Function.
  9. Click File, and Save.
  10. Now open TS and BEFORE you do anything else, check that the Toyota TIS Techstream?VIM is NOT selected, but rather the other choice (e. g. XHorse – MVCI VIM) IS selected. This ensures TS is looking at your cable.
I have deliberately not put in any detail around troubleshooting if you don’t get the right result at every step. To be honest I cannot anticipate where you might get errors (or why), I have documented (as best I remember) the process I followed and I have a working setup. So I will leave it up to people to ask questions if they strike trouble, and hopefully I or the collective minds can help out.
See also How to set up MVCI Techstream on MacBook by www.xcar360.com
Xcar360 Automotive diagnostic tool , diagnostic software
More information
Contact
Steven
Senior Sales Engineer
Xcar360.com
Skype:uuc050
Whatsapp:8613922818729

Tuesday, March 28, 2017

XTUNER X500 Installation, Download and Activation for Beginners

Here is step by step tutorial on how to install, download software and activate XTUNER X500 special function OBDII diagnostic scan


tool on Android System device.
Part 1: How to install Xtuner X500 application
Client Downloading
Access the website: http://www.tdintel.com/support
download “X500 Client.apk”
Client Setup
Run “X500 Client.apk”:


Xtuner X500 app is installed successfully!
Part 2: How to activate Xtuner X500 software
NOTE: keep network working.
Run Xtuner X500 APP
then click on “App Store” to get applications


input the S/N number and password getting from the envelope, and then click on “Login”


Tick to register and activate the scanner


input your information, incl. the Email address and country
then click on “Activate”


Note:
The email address must be real in order to get the activation link and the further better service from the manufacturer. The software update reminder and the new product release information will be sent to your mailbox.
If you do not receive the activation email, please add “service@tdintel.com” to the white list of your mailbox and try the activation process again.
Country\Region : please choice your country\region in the list.


Click on the link to get the confirmation from the manufacturer


Xtuner x500 activation success!


Part 3: How to download Xtuner x500 scanner diagnostic software
After the activation, please login the “APP Store” again, and get the APPs upgrade.


click on “Login” to download the software of special functions, incl. ?OILRESET, DPF, BATTERY, ABS BLEEDING, EPB, TPMS, IMMO&KEY, INJECTOR


Note: There are two modes for software download, one by one and one-click. It may take a long time to download all the software, depending on the network speed.
Done!
Xcar360 Automotive diagnostic tool , diagnostic software
More information
Contact
Steven
Senior Sales Engineer
Xcar360.com
Skype:uuc050
Whatsapp:8613922818729

Xtuner E3 OBD2 Full Diagnostic Scanner Win7 Win10 Test Report

XTUNER E3 WIFI OBDII diagnostic scan tool is a Anroid based full system diagnostic scan tool that supports 70 US domestic, European, Asian, Australian and Chinese vehicles makes. Xtuner E3 OBD2 scanner allows users to operate on Windows XP/7/8/10 operating system.

Here xcar360.com engineer has tested Xtuner E2 OBD2 scanner on Windows 7 and Windows 10 tablet. Working great. Some test photo attached.
2 Video demo guide will be available here.


XTUNER E3 OBD2 Scan Tool Vehicle List:

US domestic: CHRYSLER, FORD, GM, JEEP, SCION, etc.


European: ABARTH, ALFA, ASTON, AUDI, BENTLEY, BENZ, BMW, BUGATTI, CITROEN, DACIA, FERRARI, FIAT, FORDEU, JAGUAR, LAMBORGHINI, LANCIA, LANDROVER, MASERTI, MINI, OPEL, PEUGEOT, PORSCHE, RENAULT, SAAB, SEAT, SKODA, SMART, VAUXHALL, VOLVO, VW, etc.


Asian: ACURA, ASIAGM, DAEWOO, DAIHATSU, HONDA, HYUNDAI, INFINITI, ISUZU, KIA, LEXUS, MAZDA, MITSUBISHI, NISSAN, PERODUA, PROTON, SSANGYONG, SUBARU, SUZUKI, TOYOTA, etc.


Australian: HOLDEN and FORD (AUSTRALIA).


China: BYD, CHANGAN, CHANGHE, CHERY, EMGRAND, ENGLON, FOTON, GEELY, GLEAGLE, GWM, HBSH, HUACHEN, LIFAN, WULING, YUAN, etc.


OBDII vehicle: CHRYSLER, FORD, GM, TOYOTA, LEXUS, HONDA, HYUNDAI, KIA, MAZDA, MITSUBISHI, NISSAN, SUBARU, SUZUKI, ABARTH, ASTON MARTIN, BUGATTI, FERRARI, LAMBORGHINI, MASERTI, BENZ, BMW, VW, AUDI, SEAT, SKODA, PORSCHE, JAGUAR, LANDROVER, VOLVO, SAAB, ALFA, etc.

XTUNER E3 Diagnostic System Coverage

ME-Motor electronics, CDI-Common Rail Diesel Injection, ETC-Electronic transmission control, ESM-Electronic selector module, SBC – Sensotronic Brake Control, ESP-Electronic stability program, BAS-Brake assist, Suspension, TPC-Tire pressure monitor, Airbag, CGW-Central gateway, EIS-Electronic ignition switch, OCP-Overhead control panel, UCP-Upper control panel, XALWA-Xenon headlamp, HRA-Headlamp range control, ATA-Anti-theft alarm system, IC-Instrument cluster, ASSYST-Active Service System, SCM-Steering column module, EPS-Electrical power steering, PTS – Parktronic system, EPB-Electric parking brake, COMAND/AUDIO, CD/DVD, TV tuner, CTEL-Cellular telephone, DCM-Door control module, ESA driver-Electric seat adjustment driver, ESA passenger-Electric seat adjustment passenger, AAC-Air conditioning, WSS-Weight sensor system, SVMCM-Special vehicle multifunction control module, etc.

XTUNER E3 WiFi Scanner Function Review

Quick Test, Read ECU Info., Read DTCs, Erase DTCs, Clear learning value, Data Stream, Actuations, Read freeze frame data, Read/Write VIN, Basic Reset, Control unit adaptations, Throttle adaptations, Air bleeding, Level calibration, Theft alarm Reset, Key programming, Oil change, Idle speed learning, Idle speed Adjustment, Ignition timing adjustment, Camshaft timing control learning, Maintenance functions, ECU Initial startup, ECU initialization, etc
Xcar360 Automotive diagnostic tool , diagnostic software
More information
Contact
Steven
Senior Sales Engineer
Xcar360.com
Skype:uuc050
Whatsapp:8613922818729

Friday, March 24, 2017

VVDI Prog & VVDI2 Program A New Key to Porsche Paramera

It’s a good tutorial of Porsche Paramera key programming using VVDI Prog to read BCM and VVDI2 to program a new key.
Porsche BCM:


Tools needed:
VVDI PROG programmer
VVDI2 key programmer
(both made by the Xhorse)


Two main steps of Paramera key programming:
  1. Read BCM data
  2. Program a dealer key
III. Write the key

3 steps for making a new key to Paramera… Here you go.
Step 1 VVDI Prog read BCM
Disassemble the BCM
Find out the mc9s12xd512vag chip


Run VVDI Prog software
Select type: 4-immobilizer, brand: porsche, type: BCM-1L15Y


Click on Connection Diagram
Connect the MC9S12 adapter to the BCM


Remove the component and solder back after the operation is complete


Read BCM data


Then save the bin file


Step 2 Xhorse VVDI2 Key Programmer Porsche prepare dealer key
Open VVDI 2 Quick Start
Go to vvdi porsche


Select Key Learn-> new porsche key->prepare dealer key-> EEPROM 01L15Y


Load file: open the bin file (read by vvdi prog)


Select key 3


Prepare dealer key


Click on OK to save the new EEPROM dump file


Add dealer key successfully! Please learn the new dealer key via OBDII or flash the new file to the car. If you want to add a new key, please use the new save file!


Step 3 VVDI programmer add a new key
Back to VVDI-Prog ecu programmer
Open the new bin file


Write…


Operation success!


Done!


Xcar360 Automotive diagnostic tool , diagnostic software
More information
Contact
Steven
Senior Sales Engineer
Xcar360.com
Skype:uuc050
Whatsapp:8613922818729